Buenos Aires looks great through a lens. This private, 3-hour photo tour lets you see the city through the eyes of a working photographer, with personal guidance on what to shoot and how to frame it. I love that the route is tailored after you book, so the walk can match your interests instead of forcing the same checklist on everyone. You’ll also get a hands-on photo critique at the end, plus an optional improvement tutorial for Lightroom or Photoshop. One thing to consider: transport to and from the meeting point isn’t included, and good weather matters.
What makes this experience click is the mix of street time and practical teaching. The guide helps you build shots while you’re walking, then you review what you captured together so you leave with clearer next steps, not just pretty images. Nicholas, in particular, stands out in the reviews for being fun and professional, and for making sure you’re comfortable with where you go and what you shoot. Still, it’s a walking tour, so if you hate being on your feet for a few hours, plan accordingly.
Key moments happen in the details: quick feedback during the walk, suggestions on composition, and even extra help with settings and approach if you’re newer. You’ll also have the option to get a short walkthrough on editing. If you’re expecting a museum-style lesson or a bus tour with lots of downtime, this isn’t that kind of experience—this is a photo-guided stroll with coaching.
In This Review
- Key highlights worth knowing
- A 3-hour Buenos Aires photo walk with real coaching
- Where you meet on Av. de Mayo and how the flow works
- Stop by stop: how the Buenos Aires route is chosen
- Stop 1 in practice: getting shots in Buenos Aires streets
- The end-of-tour photo review and editing tutorial you can actually use
- Why the private format improves your photos
- Price and value: what $175 buys you in Buenos Aires
- What to bring so you get more out of the session
- Who this tour suits best
- Should you book a private Buenos Aires photography tour?
- FAQ
- How long is the private photography tour in Buenos Aires?
- How much does the tour cost?
- Is this a group tour?
- Where does the tour start and end?
- Does the tour include entry tickets?
- Is transport included?
- What happens during the tour?
- Is there any photo editing help?
- What if the weather is bad?
- When should I cancel to get a full refund?
- Is the meeting point easy to reach?
Key highlights worth knowing
- Private, just your group: no crowd shuffle, and the pace can follow your camera habits.
- Route arranged after purchase: you can steer the kinds of subjects you care about.
- On-foot photo coaching: you’re practicing and getting feedback while you’re still shooting.
- End-of-tour photo review: you go from photos to fixes with a clear takeaway list.
- Optional Lightroom or Photoshop tutorial: handy if you already edit and want a next step.
- Nicholas shares practical composition ideas and can even take photos of you for your memories.
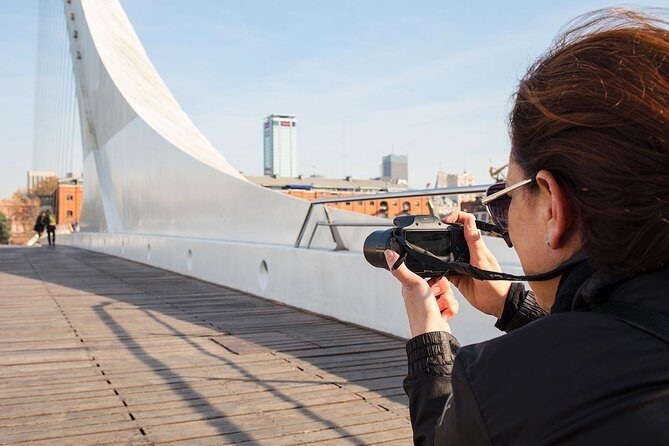
A 3-hour Buenos Aires photo walk with real coaching
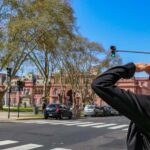
This is the kind of tour that helps you stop shooting on autopilot. You’ll start with a brief photography intro if you need it, then you hit the streets with a local professional travel photographer. The goal is simple: get you making stronger images by understanding what to include, what to ignore, and how to see the scene like a photographer.
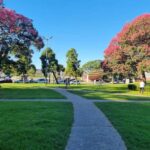
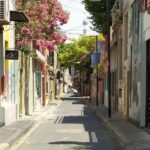
Buenos Aires is ideal for this format. Streets give you rhythm—curves, sidewalks, storefronts, balconies, and angles that change when you move a block. Since the tour is on foot, you can react to what’s in front of you instead of waiting for a scheduled stop. That’s a big deal if you’re the type who likes to chase light or shape compositions while the city is changing.
The tour also avoids the usual problem with group photo walks: you don’t just tag along. You get personal advice based on the guide’s experience and your interests, from beginner to more advanced.
Possible drawback: you’re paying for coaching, not for transport or entrance tickets. If you’re coming from far away, factor in how you’ll get to Av. de Mayo 501 (the meeting point).
You can also read our reviews of more private tours in Buenos Aires


Where you meet on Av. de Mayo and how the flow works
You meet at Av. de Mayo 501, C1066 Cdad. Autónoma de Buenos Aires. The session ends back at the same point. That matters because you don’t have to plan your return from a random neighborhood after the tour.
The hours listed (roughly early morning to late evening) mean the experience can fit into many schedules, but the key phrase is timing with your day. If you’re trying to balance shopping, a long lunch, and photo time, this 3-hour window is easy to slot in.
The meeting point is near public transportation, which helps. Just remember: transport to and from the meeting point isn’t included, so your route planning still matters.
If you’re new to photography, the first few minutes matter more than you think. The tour starts with an intro if necessary, and that early setup can prevent you from feeling lost for the rest of the walk. If you’re more advanced, you can skip a lot of the basics and use the time to focus on composition, camera approach, and editing workflow.
Stop by stop: how the Buenos Aires route is chosen
There’s one main stop in the tour structure: Buenos Aires. But the smart part is what happens inside that frame. After you book, the itinerary is arranged around what you want to shoot. That’s how you avoid the classic photo tour trap: everyone ends up photographing the same generic landmarks, even if that’s not what you came for.
From the reviews, the guide is clearly adaptable. Nicholas is described as tailoring the tour to a guest’s photo interests and making sure the direction feels right. If you want street scenes, architectural angles, or subject-focused shots, you can likely steer the balance.
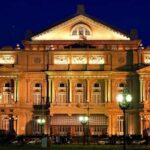
Another detail that comes up in feedback: the guide knows some historic establishments and can point you toward photo subjects connected to them, with exclusive access mentioned in at least one review. That doesn’t mean you’ll always be entering places, but it does suggest you might get shots you can’t easily get by wandering alone.
What could be a drawback? Since the route is arranged after purchase and the timing depends on conditions, you won’t have a fixed, printed list of stops to plan your entire day around. That’s not bad if you’re flexible. It’s frustrating only if you like rigid schedules.
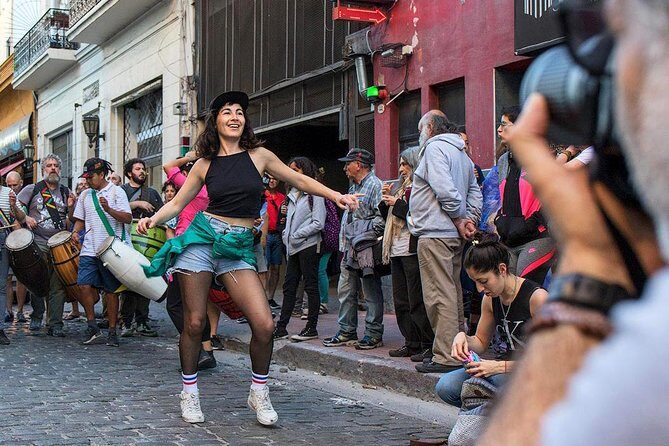
Stop 1 in practice: getting shots in Buenos Aires streets
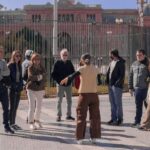
Once the tour starts, you’re walking and shooting right away. The guide leads you to visually interesting areas and gives advice as you go. Think less like a tour guide with a script and more like a photographer mentoring you mid-session.
Here’s what you can expect to help your photos most:
- Guidance on composition: how to frame a scene, where to place your subject, and what angles make the view stronger.
- Tips for turning a casual moment into a purposeful shot: changing your position, waiting for a better arrangement, and simplifying the background when possible.
- Feedback that connects with your camera type and comfort level. The tour is built for beginner to advanced.
Nicholas is also mentioned as sharing good composition suggestions for areas discussed during the walk. That sounds small, but it’s huge: it means you’re not just getting random tips, you’re building a visual pattern you can repeat.
Also, one of the practical perks: the guide takes photos of the group. If you want pictures of yourself that don’t look like they were taken by a shaky stranger, this is a real advantage. One review notes the guide provided photos after the tour, which is a nice bonus for travel memories and not only your camera roll.
The end-of-tour photo review and editing tutorial you can actually use
The last part of the tour is where the value stacks up. Instead of finishing with a good-bye and hoping you figure out your next edit step later, you review the photos together. This photo review is hands-on and focused on how to improve what you captured.
If you’re the type who struggles with editing, that final segment can save you a lot of time. The tour includes an optional short tutorial on improving images with Photoshop or Lightroom. That option matters because it matches two common workflows:
- You use Lightroom and want a better way to approach adjustments.
- You use Photoshop and want help thinking through finishing steps.
Even if you’re not editing yet, the review part still gives you a framework: what worked, what didn’t, and what you can try next time you’re on the street.
One consideration: if you’re carrying a lot of gear and you want to keep everything ready for review, plan to bring the files and workflow you’ll actually use. The tour can only work as well as your ability to show what you shot.

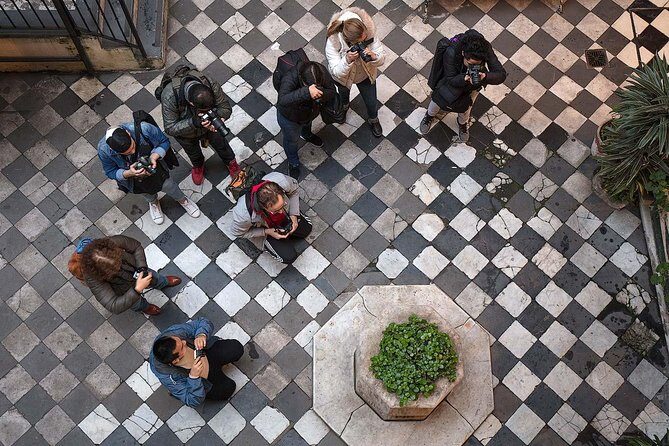
Why the private format improves your photos

A private tour changes the experience more than most people expect. In a group, you can’t pause too long or ask 10 questions about settings. With just your group, the guide can tailor pacing and attention to what you’re doing.
The tour is explicitly private, meaning only your group participates. That usually translates into:
- More time for your questions.
- Less time wasted waiting for others.
- Better feedback because the guide can see your specific frame, not a general idea.
Also, it sounds like the guide checks comfort along the way. One review calls out that Nicholas made sure the guest was okay with where they were going. In photo tours, that matters because the best subjects often require walking a bit and standing in active areas.
Price and value: what $175 buys you in Buenos Aires
At $175 per person for about 3 hours, this isn’t a bargain-basement option. But it also isn’t overpriced for what you’re getting: professional coaching, a tailored route, and end-session feedback that helps you improve.
The best way to think about value here is not the hours. It’s the teaching:
- You’re paying for personal advice while you’re shooting.
- You’re paying for a professional to look at your photos and connect feedback to real changes.
- You’re paying for optional editing instruction instead of leaving you to figure it out alone.
A group walking tour often gives you the location part and drops the coaching. This tour keeps the coaching central. If you’re a photographer—or even a phone photographer who wants better results—it’s the right match.
One cost note: transport isn’t included, so your real total depends on how you get to Av. de Mayo and back.
What to bring so you get more out of the session
The tour is described as friendly for most travelers, but photography trips work best when you’re set up for shooting quickly.
Bring what you normally shoot with. If you have:
- Your camera and any common accessories you use while traveling.
- Your most-used editing method in mind (Lightroom or Photoshop), if you want that optional tutorial.
- A willingness to adjust and try again. That’s part of what makes composition coaching work.
If you’re a beginner, you’ll likely benefit from starting with a simple plan for the kind of images you want. Tell the guide what you like—street scenes, architecture, portraits, details—and they can adjust the direction around your taste.
If you’re advanced, you can use the time for critique-level improvements: framing choices, perspective, timing, and how to refine your final look.
Who this tour suits best
This private photo tour is a strong fit if you’re any of the following:
- You want a tailored Buenos Aires photo walk, not a cookie-cutter checklist.
- You like learning photography through real scenes and quick feedback.
- You’re a beginner who wants the basics explained without turning it into a lecture.
- You’re more advanced and want composition guidance plus editing ideas.
It may be less ideal if you want a sightseeing-only tour where photos are secondary, or if you dislike walking and standing for short periods to get good shots.
Should you book a private Buenos Aires photography tour?
If you care about taking home better photos—not just more photos—this is a smart choice. The private format plus the end-of-tour review is the part that can change your results fast. Nicholas’s adaptability in the reviews is also a strong signal that you won’t feel shoved into someone else’s idea of a perfect shot.
Book it if you:
- Want personalized photography guidance during the walk.
- Like the idea of optional Lightroom/Photoshop help.
- Are okay meeting at Av. de Mayo 501 and walking for a few hours.
I’d think twice only if you need a tour with included transport, or if your schedule depends on very rigid, pre-set stops. Also, the experience requires good weather, so keep your day flexible if rain or wind is likely.
If you’re planning a Buenos Aires trip and you want your camera to do more than record, this tour gives you a clear path from shooting to improving.
FAQ
How long is the private photography tour in Buenos Aires?
It runs for about 3 hours.
How much does the tour cost?
The price is $175.00 per person.
Is this a group tour?
No. It’s private, so only your group participates.
Where does the tour start and end?
It starts at Av. de Mayo 501 in Buenos Aires and ends back at the same meeting point.
Does the tour include entry tickets?
Yes, admission tickets are listed as free.
Is transport included?
No. Transport to and from the meeting point is not included.
What happens during the tour?
You’ll start with a short photography introduction if needed, then walk through visually interesting parts of Buenos Aires with guidance. At the end, you review your photos together.
Is there any photo editing help?
There is an optional short tutorial on how to improve images with Photoshop or Lightroom.
What if the weather is bad?
The experience requires good weather. If it’s canceled due to poor weather, you’ll be offered a different date or a full refund.
When should I cancel to get a full refund?
You can cancel up to 24 hours in advance for a full refund.
Is the meeting point easy to reach?
It’s near public transportation.